One of my favorite activities each year is to host an online Emmy prediction game. I started two years ago, and it has been a great way to incorporate an "online party" with friend and family who live all over the country and world (yes, I'm talking about you, Mary!) This year was no different, and the winner then receives a prize. No one knows what the prize is ahead of time though, mostly because I don't know what it will be.
For the second year in a row, my sister won the Emmys! Ridiculous. But a ton of fun. Last year I sent her pies in a jar, this year I decided to make a hanger for her eventual wedding dress. Now this idea didn't just come to me one day, no it was while I was swimming when my swim instructor/friend said she had just purchased them for her wedding... and that when the light bulb went off in the swimming pool. Oooo... potentially dangerous. :-)

Showing posts with label recipes. Show all posts
Showing posts with label recipes. Show all posts
Saturday, April 9, 2011

Monday, February 28, 2011
Craic Cookies
In Ireland there are lots of words that I took to mean one thing that to the Irish actually mean something completely different. This Friday in Cead Mile Differences we are going to look at what some of those words and phrases are. I decided for a sneak preview we would discuss the word Craic (pronounced crack) which in Irish means good fun, or good times. I will never for get the staff meeting I sat in the first Monday I worked in Ireland asked a coworker how her weekend was. She smiled and said "it was really good, a few of the others from the office and I went out and even though it wasn't the plan, ended up having great crack." (as heard by me). I sat through the meeting freaking out wondering what the heck I was doing in a company and a country for that matter that proudly regaled their crack habits. After working up the courage to ask my supervisor if there was a serious crack problem in Ireland, the miscommunication came to light and everyone got a very big laugh (at my expense). I loved introducing this term Craic to the study abroad students that came every semester and especially loved showing the sign in the Guinness Factory that said "Welcome to Guinness, home of the craic"
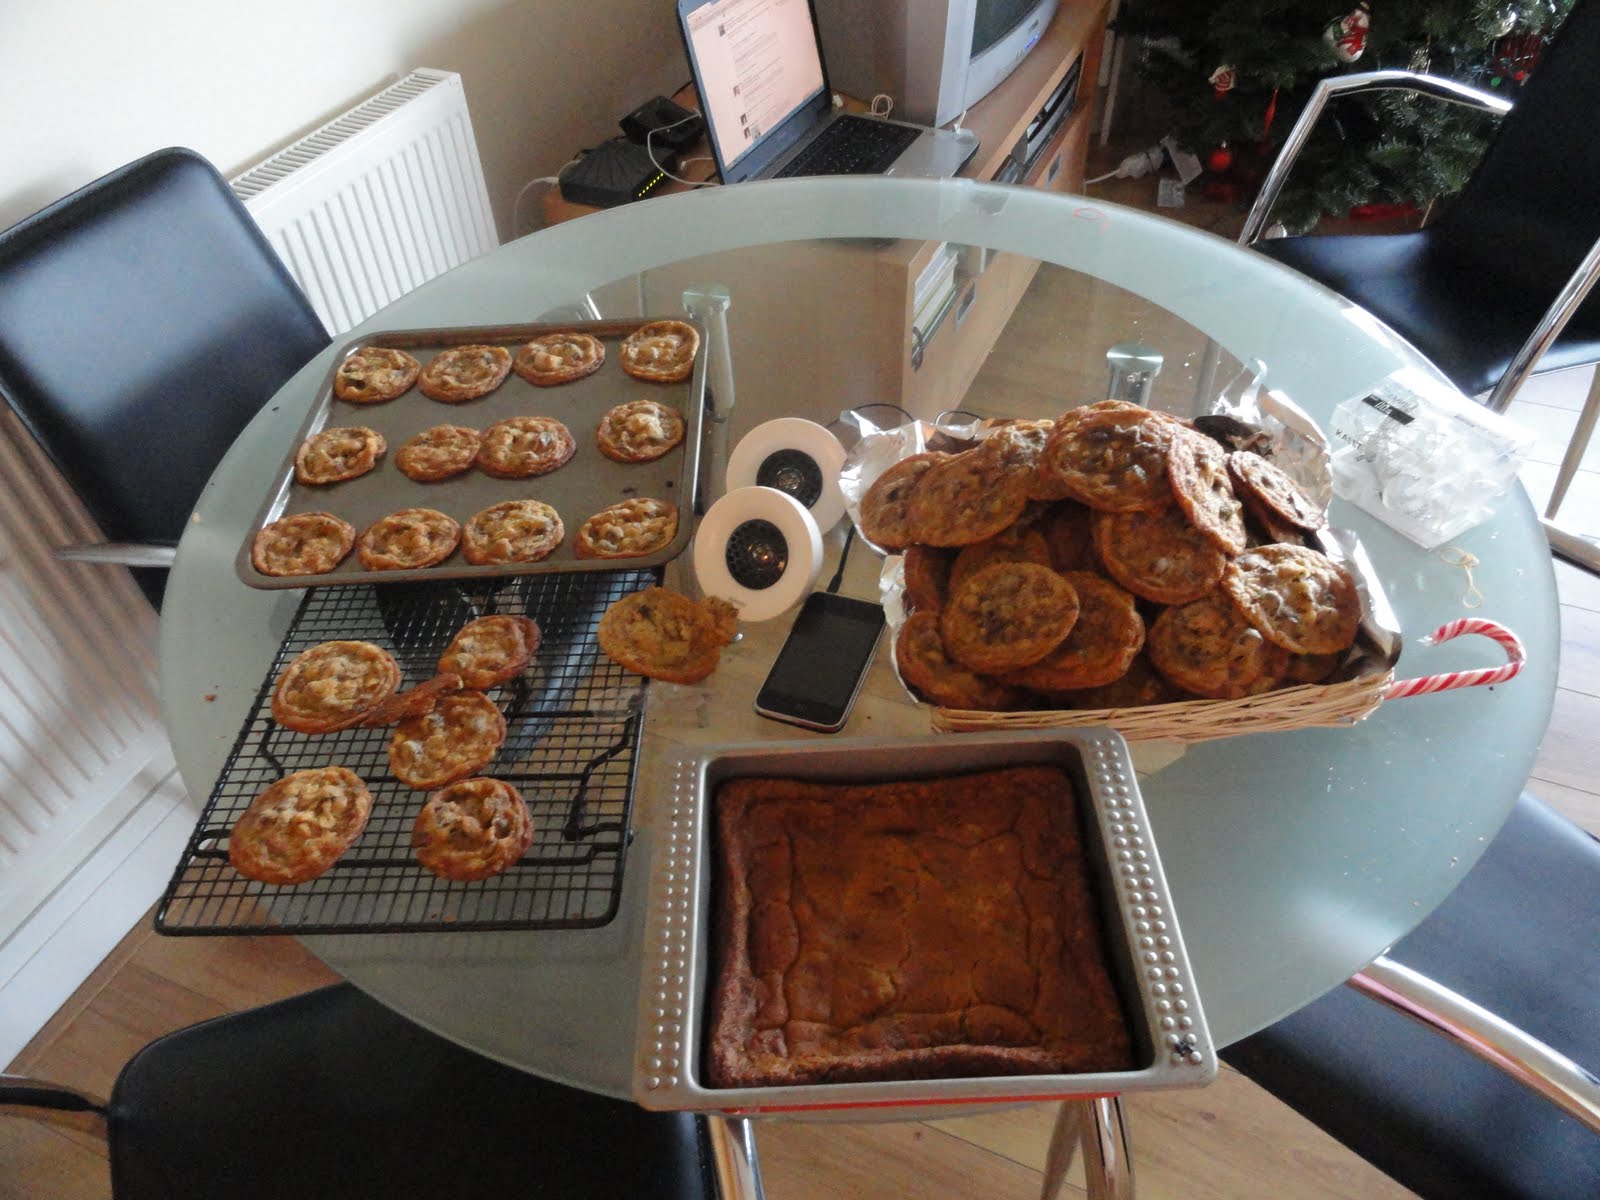
I heard about this recipe from a friend who love the Kelly and Regis show and knew that I had to make it. The first time I made these cookies were for a girlie dinner at my sisters house. Even though we had stuffed ourselves with cheese from a delicious raclette dinner, the five us managed to put away over 30 of these cookies. We weren't proud, but did deem them addictive...kind of like we would imagine crack to be. But since we are ladies and we did have good fun making and eating them - we deemed them Craic cookies - a favorite amongst my friends.
Wednesday, February 23, 2011
Travelling on my stomach
One of the perks of living abroad is being able to travel to some really amazing places. Ireland isn't on the Continent making it require a flight to get most places, but with airlines like Aer Lingus and RyanAir, if we plan ahead we can get round trip tickets for $30 to various European cities.
I have a little confession to make though - when I was a novice traveller, one of the first places I liked to identify upon landing in a new city was the McDonald's. It sounds shameful now, but there was something comforting about finding something that was the same when I was surrounded by so much that was different. I also must confess that in the early days I ate at a lot of restaurants that had pictures for menus. I am not proud, just honest!
As I became more comfortable being in places that were totally new, I also became braver. Part of that braveness came with having my sister and my friend Aaron as travelling companions. They took a lot of the scariness out of finding new restaurants and ordering new things. I also learned that I will never starve while on holiday and if I make a bad order, I can always order something else.
Wednesday, February 16, 2011
The S'moreo
So last week, my friend Val came up with a great idea.... the S'moreo. It's a smore in oreo format. So she shared it with the office. Office Patti then had the idea to email Nabisco (the maker of the Oreo) this great idea as well. And as lunches occurred, we would continuously re-invent it. We talked about it at a gathering on Saturday night, gathering the input of the office spouses. This could be fabulous.
So on Tuesday it was decided we should make them. MC had gotten materials. Val brought in the chocolate. And then the question of the actual cookie bottom came into play. It needed to be a graham cracker... but it should be round. How would one make a graham cracker round? So last evening, I made homemade graham crackers... and today the S'moreo came to fruition with the help and supplies from all in the office.
I present the Student Life S'moreo.... maybe some day it might be found at your local supermarket!
So on Tuesday it was decided we should make them. MC had gotten materials. Val brought in the chocolate. And then the question of the actual cookie bottom came into play. It needed to be a graham cracker... but it should be round. How would one make a graham cracker round? So last evening, I made homemade graham crackers... and today the S'moreo came to fruition with the help and supplies from all in the office.
I present the Student Life S'moreo.... maybe some day it might be found at your local supermarket!
 |
| Photography by Val |
Wednesday, February 9, 2011
Chex Mix of Champions
Every December growing up, I would come home from school and ask my mom "Did it come? Did we get it yet?" I remember running home from the bus stop busting through the door and looking for evidence that it had arrived. The package. The package that not only my sister and I dreamed of all year, but also our friends. The package that was filled with homemade treats we were witness to once a year.
Most of my dad's family lives in Iowa and it wasn't possible for us to spend many holidays with them. Even though we were far away, they always made us feel special. Every year for Christmas they would put together the most delicious package of Christmas goodies a girl - young or old - could ever dream of. Over the years the packages would change slightly, as would our favorite bits, but there was one constant that we received every year and was the favorite every year: Chex mix. 

I am not talking about the stuff you buy in the blue and white bag called Chex Mix. I am talking about the Mix handcrafted from the cereal and with a few special touches added in. I am sure that everyone has their favorite add-ins, but where we come from - this is the only way to make and eat Chex Mix.
The Mix
1/2 cup butter
2T Worcestershire Sauce
1 1/2 t All Season Salt
1/2 t Garlic Salt or Onion Salt
2 cups Wheat Chex cereal
3 cups Rice Chex cereal
3 cups Corn Chex cereal
2 cups Cheerios (plain, oat or honey nut)
1 1/2 cup Cashew nuts
1 1/2 raisins
Preheat oven to 275 degrees.
In a small sauce pan combine butter, worcestershire sauce, season salt, and garlic salt. Stir until butter is melted and all ingredients are combined.
In a large bowl combine all of the cereals and the nuts. Pour the melted buttery goodness onto the cereal and combine. The best way to keep from damaging the cereal and still coating all of it is to use your hands.
Spread into baking dishes and cook for 40 minutes, stirring every 10 minutes.
Remove from oven and pour raisins into the still warm mix. Watch them plump up. Try to wait it until it cools before putting first handful in your mouth.
Enjoy!
Wednesday, February 2, 2011
Proud to partake of your pecan pie
Do you remember this scene from one of the all time greatest films out there?
Sally Albright: Pepper.
Harry Burns: Pepper.
Sally Albright: Pepper.
Harry Burns: Waiter, there is too much pepper on my paprikash.
Sally Albright: Waiter, there is too much pepper on my paprikash.
Harry Burns: But I would be proud to partake of your pecan pie.

I loved When Harry Met Sally. I wrote about it in high school for my final English Paper. I quoted it endlessly. I may have *very embarrassingly* even told a few fellows that I wasn't their consolation prize. Oh the shame (and talk about dating myself!).
Anyway none of this has anything to do with the recipe I am posting today except for the fact that i can't ever see a Pecan Pie without think about Billy Crystal saying Pecan Pie and Meg Ryan trying to copy it perfectly. Sigh. If only all dating were so witty.
The funny thing is until 2010 I didn't even like Pecan Pie. Wait, I should correct myself, I didn't think I liked Pecan Pie. You see, at some point in the 1980's, probably 1982 I went to a Thanksgiving dinner at my great aunt Thelma's house. She had made many many pies, one them being Pecan Pie. I tasted it, didn't like it, and so began my vigilant avoidance of all things pecan. At the time, it wasn't so big a deal. There were loads of other dessert choices, my favorite being apple.
Fast forward nearly 30 years and I am lamenting all of the pecan pies I skipped over, assuming I didn't like them. I just ignored them, turned my nose at them, and plunged towards pumpkin or apple. Oh what I wouldn't give for a chance to apologize to those pies. Beg forgiveness.
What might have changed in 2010 to make me realise the errors of my ways you ask? For Thanksgiving we always transport cans of pumpkin from the states to Ireland and make pumpkin pie. This year with the excitement of the wedding, the pumpkin was sadly left behind. We were feeding a big crowd and needed two pies. Since I was already making apple, I decided I would make a pecan for the others. You know, those type of people, who eat Pecan Pie.
Well lo and behold. I could not get enough of the sucker. I loved it so much I made 3 more between TDay and Christmas.
The moral of the story - don't trust your 8 year old palette! Sometimes trying something again is worth the risk :)
This pie is super easy to make, but takes a long time to cook. I recommend making it immediately and sharing with as few people as possible!
Pecan Pie
½ cup sugar
4 T Brown Sugar
½ t Salt
1 cup Corn Syrup (I used light the first time and dark the rest of the time - all delicious!)
⅓ cups Melted Butter (salted)
3 Large Eggs
1 t Vanilla
1⅓ cup Chopped Pecans
Preheat oven to 350 degrees
You have two choices - make a pie crust or use a store bought. I make mine, but the non roll kind.
Combine sugar, brown sugar, salt, corn syrup, butter, eggs, and vanilla together in a bowl.
Place the chopped pecans in the bottom of the unbaked pie shell first. Next pour the yummy syrup mixture over the top.
You will want to cover the pie with tin foil for the first 35 minutes of baking. Remove tin foil and bake for another 20 minutes. Continue baking until the center if firm and no longer jiggling.
Share with only people who are incredibly dear to you!
Wednesday, October 27, 2010
When a campfire isn't available...
S'Mores Pie
I may have alluded to the fact that sometimes as an American living in Ireland, I get a hankering for something you just can’t find here. The longer I live here, the less it happens, but when it does – well I would do almost anything to feed the craving. Recently at girls night my friend Jill and I were enthusiastically telling our friends about the beauty of the S’More: Classic, simple, always delicious and rarely disappoints. The problem? In Ireland you cannot get graham crackers or American style marshmallows and the Hershey chocolate you can find is really expensive. Being a WW though I always try to keep a secret stash of Graham Crackers on hand (I bring them in my carry on when I fly back to Dublin)!
Imagine my girlish delight when I saw the recipe below on the Virtual Goody Plate . It’s a new twist on an old favourite and requires similar but not exactly the same ingredients (something Ireland is very good at). I knew I had to try it and trust me when I say I was not disappointed. Served warm it’s gooey and delicious. Chill the leftovers overnight and the next day it takes on a candybar like quality. I know we will be having this again. Don’t be intimidated by the length of the recipe either – it’s surprisingly simple and so worth the effort!

Combine the crust ingredients (I am lazy so I did this step in the pie pan)

Shape the well mixed crust around the pan. Immediately lick whatever buttery crumby goodness is left on your fingers. Put in the over for 10-12 minutes and then cool. I stuck mine in the freezer to hurry the process, but I am always looking for shortcuts!

Heat the butter and the milk on the stove top. While this is heating chop your chocolate. I didn’t chop mine small enough (see above: laziness) and it made it harder to combine in the next step. My advice – do as I say and not as I do.

Pour the hot milk/butter mixture over the chopped chocolate

Stir and be amazed at the creamy goodness you have in front of you. Let this cool completely and then pour into your cooled pie crust. The recipe says to chill overnight – I stuck it in the freezer for 90 minutes. I can see the benefits to chilling overnight, but the pie still tasted awesome.

Add your Marshmallows, trying not to play the one for the pie, one for the mouth game. Put in oven and watch carefully – they can go from white to burnt in a nanosecond!

Pull your masterpiece out of the oven and get ready to be blown away!
S'mores Pie
Crust
1 1/3 cups graham cracker crumbs (about 1 plastic wrapped package of crackers)
1/3 cup granulated sugar
5 T unsalted butter, melted
Filling
5 oz. premium dark chocolate, chopped
1/2 cup whole milk
2 T unsalted butter, cut into pieces
Pinch of salt
1/2 tsp pure vanilla extract
Topping
18 large, fresh purchased marshmallows
1. Preheat oven to 350. In a medium bowl, mix the graham crumbs, sugar and melted butter until well blended and crumbly. Transfer to a 9-inch freezer-to-oven pie pan and lightly press onto the bottom of the pan. Bake until set and fragrant, 12 to 15 minutes. Transfer to a wire rack and let cool to room temperature.
2. Place the chocolate in a medium heatproof bowl . In a small saucepan over medium heat, heat the milk and butter until the butter is melted and small bubbles form around the edges of the pan. Stir to combine. Pour the hot milk mixture over the chocolate. Let stand for several minutes, then stir until the chocolate is melted and the mixture is smooth. Stir in the salt and vanilla until blended. Let cool completely. Pour into the crust and refrigerate until well chilled, at least 4 hours or preferably overnight.
3 Heat the oven broiler to low. Cut each marshmallow in half crosswise and arrange the halves, cut side down, to cover the top of the pie. Place the pie on the lowest rack of the oven until the marshmallows toast. Watch carefully; once they start to brown, they toast quickly. Serve while the marshmallows are still warm.
Recipe from Deep Dark Chocolate: Decadent Recipes for the Serious Chocolate Lover by Sara Perry
Crust
1 1/3 cups graham cracker crumbs (about 1 plastic wrapped package of crackers)
1/3 cup granulated sugar
5 T unsalted butter, melted
Filling
5 oz. premium dark chocolate, chopped
1/2 cup whole milk
2 T unsalted butter, cut into pieces
Pinch of salt
1/2 tsp pure vanilla extract
Topping
18 large, fresh purchased marshmallows
1. Preheat oven to 350. In a medium bowl, mix the graham crumbs, sugar and melted butter until well blended and crumbly. Transfer to a 9-inch freezer-to-oven pie pan and lightly press onto the bottom of the pan. Bake until set and fragrant, 12 to 15 minutes. Transfer to a wire rack and let cool to room temperature.
2. Place the chocolate in a medium heatproof bowl . In a small saucepan over medium heat, heat the milk and butter until the butter is melted and small bubbles form around the edges of the pan. Stir to combine. Pour the hot milk mixture over the chocolate. Let stand for several minutes, then stir until the chocolate is melted and the mixture is smooth. Stir in the salt and vanilla until blended. Let cool completely. Pour into the crust and refrigerate until well chilled, at least 4 hours or preferably overnight.
3 Heat the oven broiler to low. Cut each marshmallow in half crosswise and arrange the halves, cut side down, to cover the top of the pie. Place the pie on the lowest rack of the oven until the marshmallows toast. Watch carefully; once they start to brown, they toast quickly. Serve while the marshmallows are still warm.
Recipe from Deep Dark Chocolate: Decadent Recipes for the Serious Chocolate Lover by Sara Perry
Thursday, October 21, 2010
My Biggest DIY Project
A month or so ago, I was reflecting upon life and realized that I was turning 30 in a little less than a year and a half. This wasn't really causing me to have an OMG freak out because I was going to be 30 but it did cause my to reflect what I have done, and what I could realistically try and do before I turned 30. From this self discovery time period, I decided to do a 30 things before I turn 30 list. Recently when I traveled to Seattle, I checked a few more off the list and was trying to figure out if this is something I should share here- when I realized that it made a great deal of sense.


My Second Birthday*
Apples for Autumn
Martha Stewart has a get summer recipe called the Rasberry buckle. It's a yummy white cake with a lot of fruit thrown in. I decided to try the cake portion of the recipe with my own apple version and man am I glad that I did. This cake is a perfect combination of apple goodness and cakey moistness. Carl had it with a little ice cream thrown in for good measure and said it was definitely a repeat. That's all I needed to hear to know I should share it with you.
Enjoy!
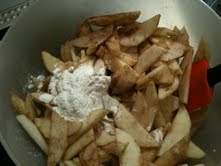
I started by peeling and cutting all of the apples. It was only when Carl came in the kitchen and asked are you going to put this on your blog that I remembered to start taking pictures. In this pic I have already mixed the apples with 2T of sugar, 1t of cinnamon, and a pinch of nutmeg. I am in the process of adding 2T of flour to the mix.

I went about this in much the same way you would with the pineapple upside down cake. I melted butter in the pan, added a bit of brown sugar and poured the apples on top. At this point I was tempted to cook the apples without the cake, but I patiently moved on.
Combine butter and sugar with an electric mixer until fluffy.

Add each egg one at a time, blending well

Add the rest of the dry ingredients, mixing thoroughly.

Pour the cake batter on top of the apple mixture and bake for 45 minutes.

Flip the cake and enjoy! This cake would taste equally delicious not flipped - it's really up to you. I think seeing the apples makes the whole dessert really enticing, but I am strange that way...food is always calling to me!
Apples
5-7 red or green apples
2 T sugar
1t cinnamon
2 T flour
bit of lemon juice
1-2t of butter
1-2t of brown sugar
Cake
1/2 cup (1 stick) unsalted butter, room temperature, plus more for baking dish
1 cup granulated sugar
3 large eggs
1 cup all-purpose flour (spooned and leveled)
1/2 teaspoon salt
1/2 teaspoon baking powder
1 cup granulated sugar
3 large eggs
1 cup all-purpose flour (spooned and leveled)
1/2 teaspoon salt
1/2 teaspoon baking powder
Preheat oven to 350 degrees.
.
Peel and thinly slice apples. Combine in bowl with sugar, cinnamon, flour, and splash of lemon juice (optional). Melt 1-2 teaspoon of butter into your pan and sprinkle with brown sugar. Pour apples in on top.
In a large bowl, cream butter and sugar with an electric mixer until fluffy. Add eggs, one at a time, beating after each addition to combine. In a large bowl, whisk together flour, salt, and baking powder; with mixer on low speed, gradually add flour mixture until incorporated
Spooky Cookies
Reading the other blogs about Halloween got me in the mood to be a little Halloween-ie myself. When my sister and I were young every easter my mom would break out the cookie ingredients and spend the morning making sugar cookie dough, chilling it and then rolling it out to cut Easter shapes. We would be allowed to invite friends over for a cookie decorating (and eating) party. We looked forward to it every year and not just for the cookies. Our mom is awesome in every way, she is supportive and wonderful and one of our best friends. She has no interest whatsoever in cooking or baking. She never really has, which is what made Easter cookies all the more special . We loved this tradition and looked forward to it every year. Being a grownup myself now, I can see what a gift that was from our mom, because she was doing something she didn’t love simply because we loved it. As an adult I have expanded decorated cookies from Easter to Valentine’s Day and now this year Halloween.
I can’t take credit for all of these though. I had help from our niece Abby, her mom and my sister. These are fun at any age and definitely a crowd pleaser (especially when brought into work).
The recipe I use for the sugar cookies comes from Pillsbury. I have tried a million recipes in my day but I find these to hold their shape the best.


Mix ingredients and add flour slowly combining thoroughly.

Cover in Saranwrap and chill in the fridge for at least one hour

I was in a rush so I did not roll the cookies, instead I just made balls.

Bake 5-9 minutes – mine took about 8. Drool over the smell wafting through your house and try not to eat them warm. Let cool for at least 20 minutes before frosting.

Use anything and everything to decorate with. I found some cute Halloween gummies that were a great base for decorations.


Take pictures immediately upon finishing because these puppies won’t last long!
Ingredients:1 cup sugar
1 cup butter or margarine, softened
3 tablespoons milk
1 teaspoon vanilla extract
1 large egg
3 cups All Purpose Flour
1-1/2 teaspoons baking powder
1/2 teaspoon salt
Sugar or decorator icing
1 cup butter or margarine, softened
3 tablespoons milk
1 teaspoon vanilla extract
1 large egg
3 cups All Purpose Flour
1-1/2 teaspoons baking powder
1/2 teaspoon salt
Sugar or decorator icing
Preparation Directions:
1. In large bowl, combine 1 cup sugar, margarine, milk, vanilla and egg; blend well. Add flour, baking powder and salt; mix well. Cover with plastic wrap; refrigerate 1 hour for easier handling.
2. Heat oven to 400°F. On lightly floured surface, roll out 1/3 of dough at a time to 1/8-inch thickness. Keep remaining dough refrigerated. Cut with floured cookie cutter. Place 1 inch apart on ungreased cookie sheets. If desired, sprinkle with sugar.
3. Bake at 400°F. for 5 to 9 minutes or until edges are light brown. Immediately remove from cookie sheets. Cool completely. Decorate as desired.
Measure all ingredients except flour.
Sunday, October 17, 2010
Sister in Seattle: Let's make Apple Pie Ice cream
So this past week I was a bit MIA because I went to Seattle! My sister moved out there in 2008 and so the past two years I have made a trip out there Columbus Day Weekend to visit her. No, we aren't the biggest fans of good ole Christopher and his Nina, Pinta, and Santa Maria.... its because she gets off that day, and its one less day of vacation she needs to take. Right before I flew out, I had found this recipe for Apple Pie Ice cream and thought this would be perfect.... I don't need to make ice cream for myself, and I could convince her and her boyfriend that we should make it there. So that's what we did! Before I get to far, lets meet the players of this weekend:

Monday, October 4, 2010
Strawberry Shortcake
Since I was a small girl I have loved shortcake, mostly because it was one of the first things I learned to make. . .if you count carefully following the shortcake recipe on the back of the Bisquick box as making something from scratch. Even at a young age, I got such satisfaction out of watching the dough fluff and turn golden, and then biting into the warm and soft but not overly sweet shortcake. My love affair with shortcake only heightened when we met again, this time at the Cheesecake Factory. Who eats shortcake at the Cheesecake factory you would be fair in asking? I do every time. I love their version so much, I have modified my own recipe to include the genius ingredient that makes theirs so good: ice cream. This recipe is quick and super easy, looks wonderful if serving to guests, and delicious every time. Enjoy!
 Gather your ingredients and preheat the oven to 425 degrees.
 Combine the dry ingredients create a well in the centre to place your egg and milk.
 Combine with a spoon or fork until just wet.
 Separate into the amount of shortcakes you want to make (I made 9 and they were a good size)
 While the shortcakes are cooking, it’s time to chop the strawberries and combine with 2 tablespoons sugar.
 For this step you can buy Cool Whip (not available in Ireland), whip cream or make your own sweet whipped cream. I chose to make sweet whipped cream.
1 cup whipped cream
2 Tablespoons Confectioners /Icing Sugar
½ teaspoon vanilla
With a hand mixer, mix cream until soft peaks form. Add sugar and vanilla, mixing until soft peaks form again. Set aside

Finished short cakes and cream:

I was transporting this dessert to girls night so I kept all the goodness separate until it was eating time to reduce the sogginess factor.

Ingredients
3 pints fresh strawberries
1/2 cup white sugar
2 1/4 cups all-purpose flour
2 teaspoons baking powder
¼ cup white sugar
1/4 teaspoon salt
1/3 cup butter
1 egg
2/3 cup milk
2 cups whipped heavy cream
Directions
Slice the strawberries and toss them with 1/2 cup of white sugar( I reduced this to two tablespoons and was still plenty sweet). Set aside.
Preheat oven to 425 degrees F (220 degrees C).
In a medium bowl combine the flour, baking powder, 2 tablespoons white sugar and the salt. With a pastry blender cut in the shortening until the mixture resembles coarse crumbs. Make a well in the center and add the beaten egg and milk. Stir until just combined.
Split evenly into 9 small shortcakes. Bake at 425 degrees F (220 degrees C) for 11 to 13 minutes or until golden brown. Let cool partially in pan on wire rack.
Slice partially cooled mini cakes in half, making two layers. Fill with ice cream and replace the top. Top with strawberries and cover with the whipped cream.
 Gather your ingredients and preheat the oven to 425 degrees.
 Combine the dry ingredients create a well in the centre to place your egg and milk.
 Combine with a spoon or fork until just wet.
 Separate into the amount of shortcakes you want to make (I made 9 and they were a good size)
 While the shortcakes are cooking, it’s time to chop the strawberries and combine with 2 tablespoons sugar.
 For this step you can buy Cool Whip (not available in Ireland), whip cream or make your own sweet whipped cream. I chose to make sweet whipped cream.
1 cup whipped cream
2 Tablespoons Confectioners /Icing Sugar
½ teaspoon vanilla
With a hand mixer, mix cream until soft peaks form. Add sugar and vanilla, mixing until soft peaks form again. Set aside

Finished short cakes and cream:

I was transporting this dessert to girls night so I kept all the goodness separate until it was eating time to reduce the sogginess factor.

Ingredients
3 pints fresh strawberries
1/2 cup white sugar
2 1/4 cups all-purpose flour
2 teaspoons baking powder
¼ cup white sugar
1/4 teaspoon salt
1/3 cup butter
1 egg
2/3 cup milk
2 cups whipped heavy cream
Directions
Slice the strawberries and toss them with 1/2 cup of white sugar( I reduced this to two tablespoons and was still plenty sweet). Set aside.
Preheat oven to 425 degrees F (220 degrees C).
In a medium bowl combine the flour, baking powder, 2 tablespoons white sugar and the salt. With a pastry blender cut in the shortening until the mixture resembles coarse crumbs. Make a well in the center and add the beaten egg and milk. Stir until just combined.
Split evenly into 9 small shortcakes. Bake at 425 degrees F (220 degrees C) for 11 to 13 minutes or until golden brown. Let cool partially in pan on wire rack.
Slice partially cooled mini cakes in half, making two layers. Fill with ice cream and replace the top. Top with strawberries and cover with the whipped cream.
Tuesday, September 28, 2010
It's freezing outside... so let's make Strawberry Cheesecake Ice Cream Sandwiches!
So for the month of September, my staff who celebrated their birthday in September got to decide what I would attempt to make for the birthday treat. I say attempt because sometimes this is like a challenge of can you actually make what I'm suggesting. This was not the case for September. It was four lovely men who celebrated their birthday this month. And here are the responses that I got:
"What ever you make Pennie will be good."
"Isn't there a recipe you want to try?"
"I like ice cream."
"I don't really like sweets, but I like cookies."
"What ever you make Pennie will be good."
"Isn't there a recipe you want to try?"
"I like ice cream."
"I don't really like sweets, but I like cookies."
Monday, September 27, 2010
Waste Not, Want Not (Bread Pudding)
The recession has hit Ireland
While Ireland Italy
Enter the recession. In the beginning (and totally by necessity) I knew my spending habits had to change, and after an awkward adjustment period (read flopping on the bed and moaning we never do anything FUN anymore) they did. Now I monitor my spending habits by choice. I am much more able to reflect on the things I need versus the things I want. I am able to enjoy the process of wanting something badly enough to save for it instead of just buying every.little.thing.my.heart.desires and wondering why and how I could still want for more.
I have learned something about myself that would have never been possible without this recession – the things that make me the most happy aren’t in a shopping mall and aren’t available at amazon.com. Don’t get me wrong – I love a good book, a fancy restaurant, and great outfit as much as the next person…but I can check the book out from the library, appreciate a meal more if it is for a special occasion, and wear the same great outfit to more than one event.
Even though I can’t wait for it to end I will always be grateful to this recession for teaching me that I love to cook and create things, that too many material possessions cluttered my heart, my head, and my bank account, and that you don’t need a lot of money to enjoy your family and friends. Lastly it taught me that I really don’t like to waste anything, especially food. I am the shopper in our household and the meal planner, and I pride myself on knowing what we need for the week. If we get to the end of the week and have to throw away anything that might have gone off, I feel like I have let myself down. Thus bringing us full circle to the recipe for this post (finally I hear you saying!): bread pudding.
I woke up this morning to make breakfast and saw that we had two loaves of bread that had four and fives pieces left respectively AND a whole new loaf. I don’t eat a lot of bread and even though Carl does, I knew he would never be able to eat it all before it got moldy. I could freeze it (but Irish freezers are tiny and thawed bread never tastes as good), I could make croutons (time consuming and so far I haven’t found a great recipe, plus Carl doesn’t really eat them) or I could make an old stand by – Bread Pudding. Simple to make, simple ingredients, and totally delicious – this is a great dessert to serve to welcome fall.
Bread Pudding



Gather your bread and cut into small pieces (I use kitchen shears to do this part).

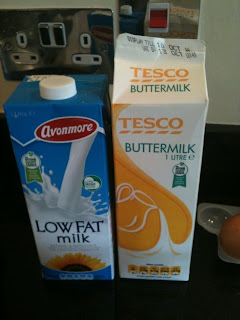
Pour milk over the bread pieces and let soak while you measure out the other ingredients (I had buttermilk leftover from banana muffins so I used half milk and half buttermilk)

In small bowl combine eggs, sugar, cinnamon, nutmeg, and vanilla. Mix well.
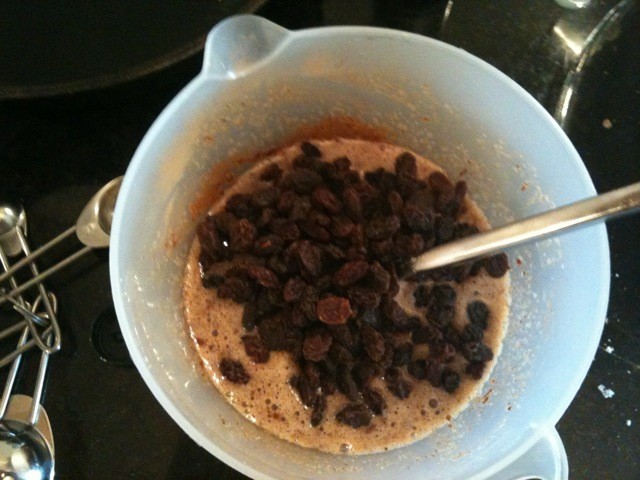
Add 1 cup raisins (and nuts if you are using them).

Combine the bread/milk with the sugar/raisin and pour into a well buttered dish.

Bake at 350 degrees for 40-45minutes. You can make a glaze to pour on top or you can spread a pad of butter and sprinkle cinnamon and sugar on top. I cheated and bought a pre made low fat custard to pour on top and it was so yummy! I love this recipe because you can throw in whatever you have laying around and it will be delicious. Some suggestions: cranberries, chocolate, nuts, craisins, more sugar, butter, different types of bread, etc.
Ingredients:5 cups cubed bread (8-10 slices if using left over bread)2 ½ cups milk2 eggs1 teaspoons vanilla½ cup granulated sugar1 teaspoon cinnamon¾ teaspoon nutmeg1 cup raisins½ cup Nuts (optional)
Preparation:Tear bread into medium pieces. Add sugar and cinnamon. Mix milk, lightly beaten eggs, and vanilla. Stir in raisins. Combine thoroughly with the bread. Place in well buttered casserole dish. Bake at 350° for 40-45 minutes or until lightly brown.
Friday, September 24, 2010
Cinnamonsational Brownies
I mentioned my sister earlier on and for those who missed that post – I pretty much think the sun sets and rises with her. I can’t help it – I adore her and have since the day she was born. I am eight years older than her and loved being her second mom, and love even more being her friend now that we are both adults. It doesn’t hurt that she finds out of this world recipes like this one and shares them with me. These Mexican brownies are to.die.for.
In the summer of 2009 we spent 10 days in Morocco with our mom and family friends. We have always liked cinnamon, but that trip reignited our love affair with it. The Moroccans have a way of adding just the right amount to enhance a dish, instead of just altering it. Even though this recipe is named Mexican brownies, I think of Morocco every time I eat them…which is approximately 10 times more than I should.


Start by gathering all of your ingredients. For me this really does save time, sanity and helps me avoid skipping an ingredient. I group them all together and then as I use them move them to the other side of the stove.

Next chop the butter into small pieces, break up the chocolate (try very hard not to eat a piece) and put in a pan over medium low heat. Stir occasionally. *For the record I have made these with salted butter and 5 ounces of the same type of chocolate or dark chocolate and it is still delicious, so feel free to use what you have on hand.


While the chocolate butter goodness is melting put the sugar and the almonds into a chopping apparatus. (I use the little dicer that came with my hand blender). Again I like to reduce sugar and in the recipe I used just over half cup and it was still delicious. Chop until the almonds are as fine as the sugar.

While the chocolate is cooling for 10 minutes this is a great time to measure remaining ingredients, butter and flour the pan, and start to tidy the kitchen.

Once cool, stir the sugar and almond concoction into the chocolate. It should look a little grainy and a whole lot delicious.

Add the eggs one at a time stirring completely.

Stir in the flour, cinnamon (I use 1 heaping teaspoon and it is a.maz.ing), and salt until just wet.

Pour into your buttered and floured pan (I use a cheapy 8 x 8 pan from Ikea). Put in the oven for 25-30 minutes. Wait for the neighbours to come to your door to ask you what that delicious smell is.

Let cool for 10-15 minutes before cutting (to me this is the hardest part). I find that using a pizza cutter keeps the brownies from dragging into each other and allows you to cut them as small or large as you like. Enjoy (and try to share – but it will be hard).
The recipe in it’s entirety:
Mexican Brownies3/4 stick (6 tablespoons) unsalted butter, cut into pieces
3 ounces fine-quality bittersweet chocolate (not unsweetened), chopped
2 ounces unsweetened chocolate, chopped
1 cup granulated sugar
1/2 cup whole blanched almonds, toasted until golden and cooled
2 large eggs
1/2 cup all-purpose flour
1/2 teaspoon salt
1/2 teaspoon ground cinnamon
3 ounces fine-quality bittersweet chocolate (not unsweetened), chopped
2 ounces unsweetened chocolate, chopped
1 cup granulated sugar
1/2 cup whole blanched almonds, toasted until golden and cooled
2 large eggs
1/2 cup all-purpose flour
1/2 teaspoon salt
1/2 teaspoon ground cinnamon
Instructions:
Preheat oven to 350°F. and butter and flour a 9-inch square baking pan, knocking out excess flour.
Preheat oven to 350°F. and butter and flour a 9-inch square baking pan, knocking out excess flour.
In a heavy 1 1/2-quart saucepan melt butter and chocolate over low heat, stirring, until smooth and remove pan from heat. Cool chocolate mixture 10 minutes.
In a food processor process sugar and almonds until ground fine. Stir almond mixture into chocolate mixture and add eggs, 1 at a time, beating well with a wooden spoon until mixture is glossy and smooth. Stir in flour, salt, and cinnamon until just combined.
Spread batter evenly in pan and bake in middle of oven 25 to 30 minutes, or until a tester comes out with crumbs adhering to it. Cool brownies completely in pan on a rack before cutting into 16 squares.
In a food processor process sugar and almonds until ground fine. Stir almond mixture into chocolate mixture and add eggs, 1 at a time, beating well with a wooden spoon until mixture is glossy and smooth. Stir in flour, salt, and cinnamon until just combined.
Spread batter evenly in pan and bake in middle of oven 25 to 30 minutes, or until a tester comes out with crumbs adhering to it. Cool brownies completely in pan on a rack before cutting into 16 squares.
Subscribe to:
Posts (Atom)